Zendesk Support SMS alerts & notifications – integration manual
Here we describe how to setup Zendesk Support with SMSEagle for SMS alerts & notifications.
SMSEagle Setup
Zendesk Support uses API to communicate with SMSEagle. Create a new user in your SMSEagle device for API access via webGUI.
- Create a new user in SMSEagle (menu Users > + Add Users, user access level: “User”).
- Grant API access to the created user:
- click Access to API beside the newly created user
- Enable APIv1
- Generate new token (copy it for later use)
- Add access permissions in section APIv1 Permission for: send_sms, send_tocontact, send_togroup
- Save settings
Zendesk Support Setup
In order to send outbound SMS via triggers and automations, we will be using the extension URL Target.
- Login to Zendesk
- Click Settings -> Extensions
- Click Targets tab -> click add target
- After clicking add target, please click on URL target
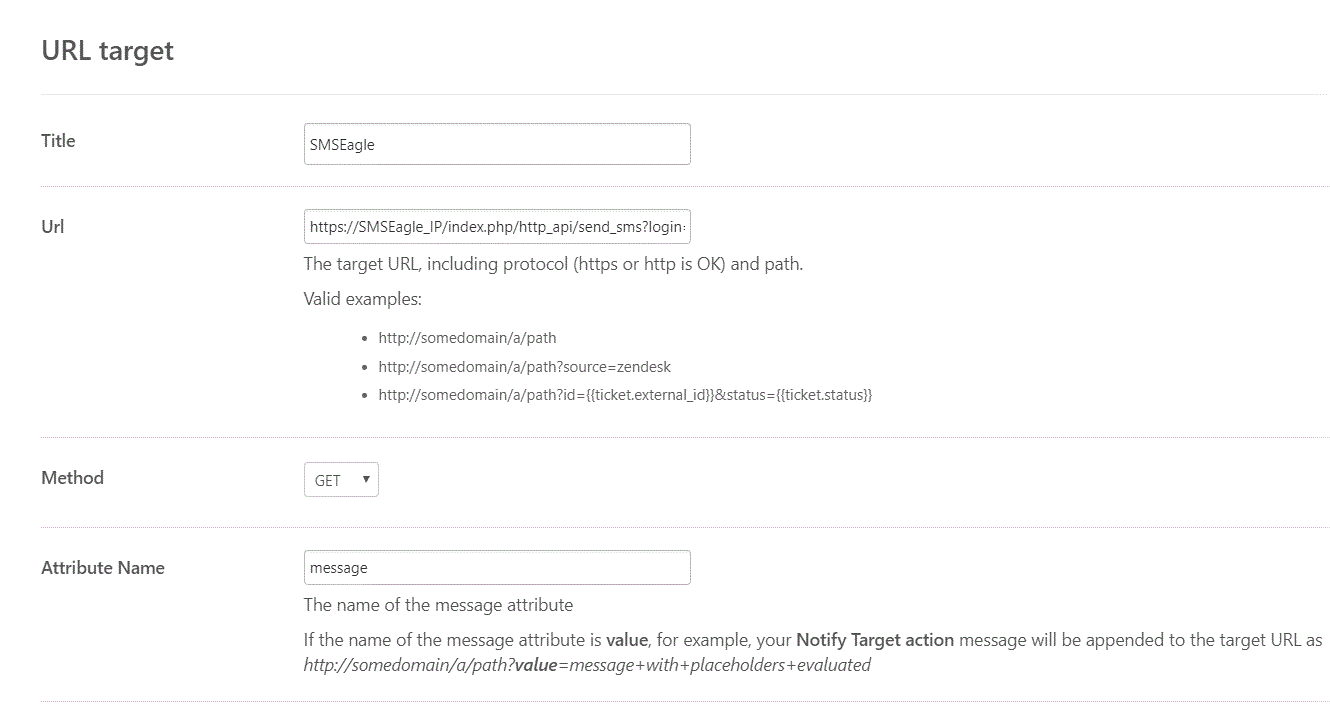
- You will then have to fill the required values for:
- Title → Name your target as desired
- URL → https://SMSEagle_IP/index.php/http_api/send_sms?login=john&pass=doe&to={{ ticket.requester.phone}} if you want to send SMS to the ticket requester.
You may choose to use other placeholders with the to parameter instead of {{ticket.requester.phone}}.Replace SMSEagle_IP with your gateway’s IP address, and john and doe with SMSEagle username & password created in point above. - Method → use GET
- Attribute Name → message
- Basic Authentication → leave blank as your credentials are set in the URL field
- To check if all the details are correct, click on Test Target → Submit. You should get a success response if the details are correct (i.e. SMSEagle URL and credenials). Once you have successfully tested it you can go ahead and create the target.
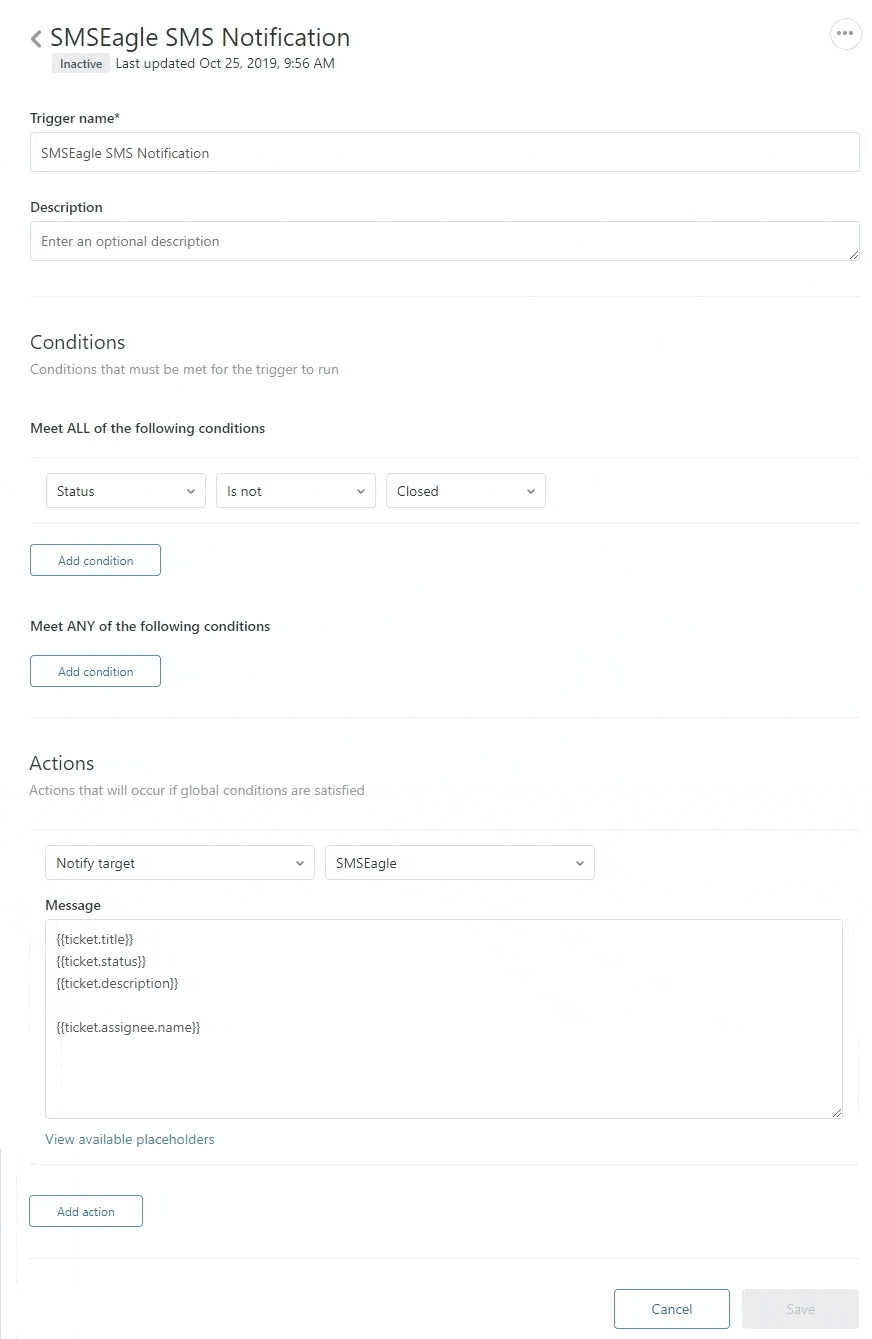
- To configure Zendesk to send your SMS notifications using a trigger, click Triggers under Business Rules: Click Add Trigger and configure the trigger.
- Populate the Conditions fields that you want to be true for the Trigger and set up the action to be performed. In this case, the action will be ’Notifications: Notify target’ and you will select the previously created Target. You can populate the message field with the text that you want to be sent, using Zendesk placeholders as desired.
- Note that if have used the {{ticket.requester.phone}} placeholder in your target, you must ensure that the phone number field is correctly populated in the Zendesk user profile (using the international format, ie. +1, +44).
- You can now send an SMS from Zendesk using the SMSEagle HTTP API!
- The recipient configured in your target (eg. the ticket requester) will receive an SMS via the SMSEagle.


